
So, you’ve decided to hit the slopes, carve your first turns, and embrace the exhilarating world of snowboarding! That’s fantastic! As you stand on the cusp of this amazing adventure, you might be wondering, “What on earth do I need to bring?” Don’t worry, we’ve all been there. The sheer amount of gear can feel overwhelming at first, but with a little preparation and this comprehensive checklist, you’ll be ready to tackle the mountain with confidence.
This isn’t just about ticking boxes; it’s about ensuring your comfort, safety, and enjoyment. Getting the right gear makes a world of difference, transforming a potentially cold and frustrating experience into one filled with stoke and pure shredding bliss. Think of this as your personal snowboarding bible, guiding you through every essential item.
Your Snowboard and Bindings: The Foundation of Your Ride
This is arguably the most critical part of your snowboarding setup. Your board and bindings are what connect you to the mountain, and choosing the right ones will significantly impact how you learn and progress. As a beginner, you’re not looking for cutting-edge technology or specialized boards. Instead, you want something forgiving, stable, and easy to maneuver.
Choosing Your First Snowboard
For your initial foray into snowboarding, a beginner-friendly board is paramount. These boards are designed to make your learning curve less steep, literally and figuratively.
Shape: What’s the Difference?
You’ll encounter a few key shapes for snowboards, and for beginners, one stands out.
True Twin:
A true twin board is symmetrical along its length. The nose and tail are identical, meaning you can ride it equally well in both your regular stance (leading with your dominant foot forward) and your goofy stance (leading with your non-dominant foot forward). This symmetry is incredibly beneficial for beginners. Why? Because you’re going to be falling, and you’re going to be experimenting with which foot feels more natural forward. A true twin allows you to flip the board around and practice with either foot forward without changing your feel or performance. It promotes balanced riding and makes it easier to get comfortable with the sensation of being on a snowboard.
Directional Twin:
A directional twin board is also mostly symmetrical, but it has a slightly longer nose than tail. While still offering a lot of versatility, it’s designed to perform a little better when riding in your preferred direction. For beginners, this is often still a viable option, as the directional aspect can offer a touch more stability and float in powder if you decide to venture off-piste (which you won’t be doing much of on day one). However, if you’re truly focused on learning the basics of turning and control on groomed runs, a true twin is often the simpler choice.
Directional:
A purely directional board is asymmetrical, with a distinct nose and tail, designed specifically for riding in one direction. These boards are typically stiffer and have a setback stance (where the bindings are mounted closer to the tail). While excellent for speed and powder, they are not ideal for beginners learning switch (riding backward) or for those who want maximum flexibility in their early stages. Stick to twins for now!
Flex: How Stiff or Soft?
The flex of your snowboard refers to how much it bends when you apply pressure.
Soft Flex:
Beginner boards almost universally have a soft flex. This is your best friend when you’re learning. A soft flex makes the board more playful, easier to press into turns, and more forgiving of mistakes. When you accidentally catch an edge (a very common occurrence for beginners), a softer board is less likely to violently stop you in your tracks, potentially leading to a minor slide rather than a painful tumble. It allows you to feel the snow more intuitively and experiment with carving without needing a lot of strength or finesse.
Medium Flex:
As you progress, you might move to a medium flex. This offers a good balance between forgiveness and responsiveness. It’s still manageable for learning but provides more pop and stability at higher speeds.
Stiff Flex:
Stiff boards are for advanced riders. They offer maximum power transmission and stability at high speeds but require more technique and force to control. Avoid these as a beginner.
Camber Profile: The Shape of the Bottom
The camber profile is the shape of the snowboard when viewed from the side, specifically the curve between the contact points of the nose and tail. This is a crucial factor in how your board interacts with the snow.
Rocker (Reverse Camber):
A rocker profile curves upward between your feet, with the nose and tail lifting off the snow. This design makes the board feel “loose” and incredibly forgiving. It’s very difficult to catch an edge with a rocker board, making it a popular choice for beginners. It’s also great for powder, as the lifted nose and tail help you float on top of the snow. The downside is that it can feel less stable at higher speeds and offer less “pop” for jumping.
Flat Top:
A flat top board has a flat base between your feet. This offers a good balance of stability and edge hold compared to rocker, but can still be prone to edge catches. It’s generally more forgiving than traditional camber.
Hybrid Camber/Rocker:
This is the most common profile for beginner boards and for good reason. Hybrid profiles combine elements of rocker and camber. You might have rocker between your feet with camber underfoot, or a combination of rocker at the nose and tail with camber underfoot. These profiles aim to give you the best of both worlds: the forgiveness of rocker for easy turning and reduced edge catches, and the stability and edge hold of camber for grip and control. For most beginners, a hybrid profile is an excellent starting point.
Size Matters: Finding the Right Length
The size of your snowboard is determined by your height and weight.
Height:
A general rule of thumb is that your snowboard should come up to somewhere between your chin and your nose when standing it on its tail. However, this is just a guideline.
Weight:
Weight is actually a more critical factor than height. A heavier rider will need a longer and/or wider board for adequate support and to prevent the board from feeling too “whippy” or unstable. Conversely, a lighter rider can get away with a shorter or narrower board. Most snowboard manufacturers provide sizing charts that correlate height and weight to recommended board length and width.
Waist Width:
This refers to the width of the board at its narrowest point. If you have larger feet (typically men’s size 11 and up, women’s size 9 and up), you’ll likely need a wider board, known as a “wide” board. This prevents your boots from dragging on the snow when you’re on an edge, which is called “boot out” and can cause you to fall.
Don’t Forget Your Bindings: Connecting You to the Board
Your bindings are what attach your boots to the snowboard. They need to be comfortable, secure, and compatible with your boots.
Types of Bindings:
You’ll primarily encounter two types of bindings.
Strap Bindings:
These are the most common type for beginners and intermediates. They consist of a baseplate, a highback (the part that supports your calf), and two straps that secure your boot to the binding. One strap goes over your forefoot, and the other goes over your ankle. They offer a good balance of support and adjustability.
Step-In Bindings:
These bindings are designed to be used with specific boots that have a locking mechanism. You simply step your boot into the binding, and it clicks into place. While convenient, they can have a slightly different feel and might not offer the same level of adjustability as strap bindings, making them slightly less ideal for a complete beginner who is still figuring out their preferred fit and feel.
Choosing the Right Flex for Bindings:
Similar to snowboards, bindings have a flex rating.
Soft Flex Bindings:
For beginners, soft flex bindings are recommended. They offer a forgiving feel, allowing your ankles and knees to move more freely. This is important for learning to flex and extend your legs when turning. They also tend to be more comfortable for long days on the mountain.
Medium Flex Bindings:
As your skills develop, you might consider medium flex bindings. They provide a bit more responsiveness and support, allowing for quicker edge-to-edge transitions.
Stiff Flex Bindings:
Again, avoid stiff flex bindings as a beginner. They offer maximum power transfer and support but are less forgiving and can be harder to control.
Compatibility:
Ensure your bindings are compatible with your snowboard. Most snowboards have standard mounting systems (like 4×4 or 2×4 inserts), and most bindings will work with these. Your local surf shop can help you confirm compatibility.
If you’re just starting out in snowboarding, having the right gear is essential for a safe and enjoyable experience. To help you get started, you can check out a comprehensive beginners checklist for snowboarding gear that covers everything from boards to boots. Additionally, if you’re interested in exploring related winter sports equipment, you might find this article on the top 10 best snowmobile dollies quite informative. You can read it here: Top 10 Best Snowmobile Dolly – Latest Bestsellers Only.

- STAY WARM AND COMFORTABLE: Made with ultra-soft fleece lining and 4-way stretch material, this balaclava skimask ensures a snug fit while keeping you warm and cozy, even in freezing temperatures.
- BREATH EASILY: Featuring breathable mesh paneling, our ski mask for men and women enhances airflow and prevents moisture buildup, keeping you fresh and comfortable during high-intensity activities like skiing or running.
- ALL WEATHER PROTECTION: This face covering has a waterproof shell and extended neck coverage to shield you from harsh wind, rain, and snow, making it ideal for outdoor adventures, commuting, or industrial work.
- STRETCHY HELMET-FRIENDLY FIT: Designed with flat lock seams and a flexible hinge, it fits seamlessly under helmets, ensuring maximum comfort for skiers, motorcyclists, and tactical users.
- NO MORE FOG: Engineered to prevent fogging on goggles or glasses, this balaclava allows you to stay focused and confident whether you're hitting the slopes or cycling through the city.

- 【Professional Ventilation】-Designed to reduce fogging and optimizes the flowing air over the inside of the lens.ski goggles provide smooth air-flow system which brings fresh air and exhaust moisture quickly and effectively.
- 【Performance Double Lens】-Anti-scratch,anti-fog,impact resistance,full face real revo mirror coating reflective lens,100% UV protection,more solid & durable than others ski goggles.The inner lens made by Italy with PRO long-lasting anti fog performance materials,working with ventilation system.NO fogging up when skiing or snowboarding.Great optical clarity spherical lens and frameless design create a super wide HD vision.
- 【Oversized OTG (above the glasses) design】-With the OTG (above the glasses) design, the Skiing glasses allow you to wear the glasses under the goggles, and the goggles are also suitable for those who wear glasses. It is perfect for skiing, skiing, snowboarding, ice skating, rock climbing, motorcycling/mountain riding, aerial driving, bungee jumping and more.
- 【Helmet Compatible & Adjust Strap】-Silicone-backed non-slip , widening high density 3D jacquard extra long strap. Great Materials - Comfortable , warm , safe & breathable materials . Premium TPU frame, triple-layer foam. This ski goggles is not suitable for kids under 12.
- 1 Year Guarantee:】These ski goggles are designed for Men, Women and Youth , and there are many more innovative children's ski goggles to offer your choices in our Findway Store. In addition, we provide unconditionally refund or free replace if defective or any quality problems.If you met problem in using our ski goggles,please do not hesitate to email us, we provide 24/7/365 kindly service.

- Be limitless, Be fearless -- Your choice of rugged and hidden armor for your vulnerable hip, thigh, sit bone, and tailbone that efficiently bends and moves along with the body. Have your own Bodyprox Protective Shorts during outdoor and all action sports activities such as Snowboarding, skateboarding, Cycling, roller sports, mountain biking, skating, and other extreme activities.
- Premium Protection -- With our very own Protective Shorts that are equipped with generous shock absorbing EVA foam cushions strategically placed to the rear, thigh and tailbone area, this ensured exceptional comfort and protection from scratches, bumps or even drop during an intense outdoor activity.
- Skillfully produced from the highest-grade breathable fabric, combine features of Nylon and Spandex, skin-friendly material that absolutely fit your body, quick-dry technology which prevents fabric from sticking to the skin, providing an exceptional ease of use at the same time, have soft and comfortable custom fit waistband that allows excellent mobility.
- Durable and Flexible -- Durability and stability whilst flexible at the same time without the discomfort that comes with traditional and known padded shorts. Your all-in-one protection for lumbar, butt and thigh area.
- Relaxed-Fit and Skin-Friendly -- Since it is ideally worn underpants, it is the combination the highest grade elements from Nylon, Spandex and Vent Mesh materials keep the skin from moisture and retains the skin cool, dry and fresh. Lightweight even with sufficient amount of pads and precisely designed for comfort.

- Keep Warm, Windproof, Water-resistance - As the blockbuster product, ihuan mens winter gloves integrate stylish and performance. Skin-friendly waterproof fabric outer, soft and dense fleece lining, combined with the adjustable windproof cuff to keep snow and ice from getting inside, increasing the force for the cold resistance. Keep your hands warm and comfortable in freezing winter. Best suited for temperatures of 20 °F - 32 °F (Not applicable in extreme weather)
- Light, Soft and Not Bulky - A pair of lightweight, windproof, water-resistance winter gloves are more suitable for daily life and work. It can keep your hands warm and dry even on snow or light rain days. Whether shoveling snow, cycling, driving, running, hiking, camping, snowball fights, skiing, walking dogs, outdoor chores, etc. It's a perfect choice.(The cuffs of the gloves are not waterproof, so please avoid getting the cuffs wet.)
- Non-Slip Palm Design - Covered with anti-skid design of microfiber leather on the palm, which effectively increases the grip and abrasion resistance of ihuan thermal winter gloves. You can grip things firmly to ensure safety. Such as gripping the steering wheel firmly when driving, and holding your phone well to prevent it from falling and breaking.
- Sensitive Touchscreen - We've tested multiple conductive fabrics over and over again to achieve a more sensitive touchscreen experience. Our therm gloves for cold weather can keep your hands warm but still allow you to operate your phone. Don't miss important calls, deal with urgent work in time, and take pictures of beautiful scenery.
- Washing and Drying Instructions: Turn the gloves inside out. Hand wash at room temperature using a mild detergent. Do not wring the gloves vigorously (to avoid damaging the internal waterproof membrane). Do not use high-temperature drying methods (such as a dryer), as heat may compromise the membrane's waterproofing. Instead, lay the gloves flat to dry naturally in a cool, well-ventilated area or in the shade.

- Carhartt label sewn on front
- Prev; Name: Acrylic Watch Hat
- Hand wash only
- Stretchable rib-knit fabric

- AIR HOLE DESIGN.
- Fog-free : The Ski Mask features breathable vents at the nose and mouth so you can keep it on all day — no retaining moisture, and no fogging up your helmet, goggles, or glasses when you’re out on the roads, slopes, or trails.
- Keep Warm - Protects your skin from freezing temperatures.
- Comfortable enough to wear all day, the Neck Warmer Face Mask has an ergonomic fit that stays in place. No sliding down or shifting, and no fussing or readjusting, even when you’re on the move and staying active. Its flexible design moves with you to keep you protected so you can just focus on having fun.
- Whether you like to ski, snowboard, bike, or motorcycle in the cold weather, this mask will sit comfortably under helmets of all types.
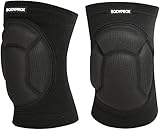
- 1 Pair Kneepads (Left and right), Unisex design, two sizes available.
- Your Safety is Our Priority-made of high-density strengthen foam, good elasticity, breathable fabric keeps skin dry, and more comfortable.
- Ergonomic design, super lightweight, provides freedom of movement. An ideal knee protector for outdoor sports.
- Protect and Prevent knee injuries during exercise. Keep warm, prevention and reduction of stiff muscles and joints. Effectively impact proof, increase blood circulation.
- Great Grip, Non-Slip Feature! Easily put the knee pads on and forget that you had them on! That’s how comfortable it is whilst in use. No constant re-adjustment needed as it firmly hugs the knee!
- WATER RESISTANT & WINDPROOF FABRIC - This Balaclava hood is made from water resistant and windproof fleece thermal fabric to effectively reduces the cold index. But it is not full waterproof, it is okay in the light rain but not long time.
- BREATHE FREELY - This full face cover has a breathable mesh design on the nose and mouth part so that you can breathe freely while still keeping warm.
- UNISEX BALACLAVA HAT - Stretchable fabric to fits most heads, it is a good winter gear for men and women.
- GOOD DESIGN - It is a multi-fuctional balaclava, such as, neck warmer, cold weather face cover, head protection from cold, wind, sprinkle and dust. It can be used as neck scarf, bandana and winter cap. The black color can match almost each kind of design and color of clothes.
- GOOD CHOICE IN WINTER FOR - Skiing, Snowboarding, Cycling, Motorcycle, Hunting, Hiking, Climbing, Airsot paintball, Tactical training and so on...

- Keep Warm, Windproof and Waterproof: RIVMOUNT Winter Gloves are designed to keep your hands warm and comfortable in freezing winter. The skin-friendly waterproof fabric outer, soft and dense fleece lining, and adjustable windproof cuff provide excellent cold resistance. It will keep your hands stay warm and dry, whether you're running, driving or biking. The RIVMOUNT Winter Gloves for women mens, integrating stylish and performance, are a great pick for cold weather.
- Lightweight, Soft and Dextrous: These lightweight and water-resistant gloves are perfect for daily life and winter work. It can keep your hands warm and dry even on snow or light rain days. They are super warm , comfy, and moisture resistant, but not bulky at all. Whether you're shoveling snow, sledding, cycling, hiking, camping, commuting, or engaging in indoor outdoor chores, RIVMOUNT Warm Gloves are the ideal choice. Stay warm and protected in stylish design, providing good flexibility.
- Sensitive Touchscreen: Our womens and mens gloves both feature a highly sensitive touch screen function, all fingers made of sensitive conductive fabrics. You can easily operate your phone without taking off the thermal gloves, allowing you to stay connected and productive. It is great for phone use, like answering calls or texting, or for working with devices. These phone gloves will be a perfect fit for walking dog, jogging, delivery, skiing, snowmobiling, snowboarding, hunting or camping.
- No-slip Palm & Safety Design: The PU leather palm with anti-slip design enhances grip and abrasion resistance. You can confidently hold the steering wheel while driving, and securely handle your phone without the fear of dropping it. Plus, there are reflection patterns on the back of the bike gloves. It can reflect light and improve the safety of cycling at night. Safety and convenience at your fingertips. Perfect for anyone who likes to go out for a walk or play outside on a cold weather day.
- More Humanized Design & After Service: The portable buckle makes it convenient to carry and keep them always in a pair. The adjustable cuffs facilitates the wearing and removal. And you can also adjust the tightness freely by it. The fineest craft and quality material are definitely worth your investment, they are the ideal gifts for your friends and families. If you are not satisfied with your purchase, our dedicated customer service team is always here to assist you. Try them risk-free now.

- This extremely lightweight Balaclava made of 100% fleece polyester fabric, cozy stretchable fleece, will keep you covered with comfortable, breathable material whenever you put it on!
- Adjustable elastic design: adopt adjustable design, there are black knit strings on the left and right sides of the hat, which can be adjusted to a comfortable feeling and make it better block the wind and snow from entering. Unisex Windproof ski mask, one Size fits all.
- More Ways to Keep Warm: This fleece balaclava can be worn as a neck warmer, half mask or a full balaclava for the best cold weather protection.
- Made of 4-way stretch fabrication allows greater mobility & maintains shape, feels super soft, windproof and breathable, excellent absorbency , providing your face with comfortably protection.
- FULL FACIAL PROTECTION: Multi-Purpose Face Mask Sports Balaclavas offer you full facial and neck protection for winter and summer outdoor activities - outdoor hiking, camping, hiking, skiing, cycling skiing, snowboarding, snowmobiling, cycling, motorcycling, trekking, mountain climbing and other.
Your Snowboard Boots: Comfort and Control on Your Feet
Your snowboard boots are your direct interface with the bindings and the board. They are crucial for both comfort and control. Ill-fitting or uncomfortable boots will make your entire snowboarding experience miserable.
The Importance of Fit
This is non-negotiable. You need boots that fit like a glove – snug but without any painful pressure points.
Trying Them On:
This is where visiting a reputable snowboard shop is invaluable.
Wear Your Snowboard Socks:
Always try on snowboard boots with the same type of socks you plan to wear on the mountain. These are typically thicker and have specific cushioning.
Lace Them Up Properly:
Lace or tighten your boots as you would when riding. Ensure your heel is locked into the back of the boot. There should be no significant heel lift when you walk around.
Walk Around:
Walk around the shop, go up and down stairs if possible. Pay attention to any pinching, rubbing, or discomfort. Your toes should lightly brush the front of the boot when you’re standing straight, but should not be jammed against it. When you bend your knees (like you would in a snowboarding stance), your toes should pull back slightly and no longer touch the front.
Consider Different Lacing Systems:
Snowboard boots come with various lacing systems: traditional laces, speed lace systems, and Boa systems.
- Traditional Laces: Offer the most customizable fit but can be time-consuming to adjust on the mountain.
- Speed Lace Systems: Use a series of loops and cords that you pull to tighten. They are faster than traditional laces and offer good adjustability.
- Boa Systems: Feature a dial that you turn to tighten a series of cables. They are the quickest and easiest to adjust but can sometimes have issues with the mechanism if not properly maintained. As a beginner, any system will work, but ease of adjustment on the fly can be a major plus.
Boot Flex: Matching Your Riding Style
Just like snowboards and bindings, boots have a flex rating.
Soft Flex Boots:
Beginner boots are almost always soft flex. This provides maximum comfort, allows for natural ankle movement, and absorbs impact well. This flexibility is key to learning how to bend your knees and ankles to initiate turns and maintain balance.
Medium Flex Boots:
As you improve, you might opt for medium flex boots. They offer a bit more support for steeper terrain and quicker edge-to-edge transitions.
Stiff Flex Boots:
Stiff boots are for advanced riders who need maximum power transfer and support for aggressive riding. Avoid these as a beginner.
Staying Warm and Dry: Essential Apparel
This is where comfort meets functionality. The right clothing will keep you warm and dry, allowing you to focus on learning and enjoying your time on the snow.
The Layering System: Your Best Friend
The concept of layering is fundamental to staying comfortable in cold weather. Instead of one bulky item, you’ll wear multiple thinner layers that trap air and provide insulation.
Base Layer: The Foundation of Warmth
This is the layer that sits directly against your skin. Its primary job is to wick away moisture (sweat) from your body to keep you dry.
Material Matters:
- Merino Wool: An excellent natural fiber that is soft, warm, odor-resistant, and insulates even when wet. It’s a pricier option but worth the investment for its performance.
- Synthetics (Polyester, Nylon): These are also great at wicking moisture and are generally more affordable than merino wool. Look for high-quality synthetic base layers that are breathable and comfortable.
- Cotton: AVOID! Cotton absorbs moisture and holds it against your skin, making you cold and uncomfortable. Never wear cotton as a base layer in cold weather.
Mid Layer: The Insulation
This layer provides the bulk of your warmth by trapping body heat.
Fleece:
A classic and reliable mid-layer. It’s warm, breathable, and relatively inexpensive.
Down or Synthetic Insulation:
A lightweight puffy jacket or vest can provide excellent insulation. Synthetic insulation is generally preferred for its performance when damp.
Technical Fabrics:
Many brands offer mid-layers made from technical fabrics that offer a good warmth-to-weight ratio and breathability.
Outer Layer: Protection from the Elements
This is your waterproof and windproof shell, designed to keep out snow, rain, and wind.
Snowboard Jacket:
Your snowboard jacket should be waterproof and breathable. Look for features like ventilation zips (pit zips), a powder skirt (a skirt-like lining designed to keep snow from coming up your jacket), and ample pockets. The waterproof and breathability ratings are important – higher numbers mean better protection.
Snowboard Pants:
Similar to the jacket, your snowboard pants need to be waterproof and breathable. Look for reinforced cuffs to prevent damage from your snowboard edges, gaiters (straps that go over your boots to keep snow out), and adequate insulation. Consider “insulated” pants versus “shell” pants based on your preference for warmth. Shell pants, combined with a good base layer, offer more versatility.
Protecting Your Extremities: Crucial for Comfort
Your fingers, toes, and head are the first to get cold. Proper protection is vital.
Gloves or Mittens:
This is a personal preference, but both offer good protection.
Mittens:
Mittens generally keep your hands warmer because your fingers share heat. They also tend to offer more freedom of movement for your fingers.
Gloves:
Gloves offer more dexterity, which can be helpful for adjusting bindings or using your phone.
Waterproofing and Insulation:
Whatever you choose, ensure they are waterproof and well-insulated. Many snowboard gloves and mittens have a waterproof insert and insulation.
Headwear: More Than Just Style
You lose a significant amount of heat through your head.
Beanie:
A warm beanie is essential for when you’re not wearing a helmet. Look for one made of wool or fleece.
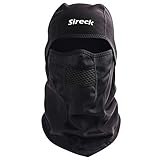
Balaclava or Neck Gaiter:
These are incredibly useful for protecting your face and neck from wind and cold, especially on windy days or when you’re riding at speed. They can be pulled up over your nose and mouth.
Don’t Forget Your Feet!
Proper socks are just as important as well-fitting boots.
Snowboard Socks:
- Material: Again, merino wool or synthetic blends are your best bet. Avoid cotton at all costs.
- Thickness and Cushioning: Look for socks with cushioning in key areas like the shin, heel, and toes to provide extra comfort and absorb impact.
- Height: Snowboard socks are typically taller, coming up past your ankle and often under your knee, to prevent rubbing from your boot cuff.
Safety First: Protecting Yourself on the Slopes
Snowboarding is an inherently active sport, and while all precautions are taken, sometimes falls happen. Investing in safety gear will protect you from more serious injuries.
The Helmet: Non-Negotiable
This is arguably the most important piece of safety equipment you can own.
Fit is Key:
Just like boots, a helmet needs to fit properly to be effective.
Try Before You Buy:
Always try on helmets before purchasing. They should feel snug but not constricting.
No Wobbling:
With the chin strap loosely fastened, the helmet should not wobble around excessively on your head.
Chin Strap Adjustment:
Once adjusted, you should only be able to fit one or two fingers between the strap and your chin.
Ventilation and Features:
Many helmets have adjustable vents to regulate temperature. Some also have integrated audio systems or mounts for action cameras.
Goggles: Clarity and Protection for Your Eyes
Goggles are essential for protecting your eyes from the sun, wind, snow, and debris.
Lens Technology:
Goggles come with different lens tints that are suited for various light conditions.
Low Light/Cloudy Conditions:
Lenses in the yellow, orange, or pink spectrum improve contrast and visibility in flat light or overcast conditions.
Sunny Conditions:
Darker tinted lenses (grey, brown) reduce glare and protect your eyes from bright sunlight.
Mirror Lenses:
These have a reflective coating that further reduces glare.
Anti-Fog:
Most good quality goggles will have anti-fog coatings, but it’s essential to keep them clean and dry to maximize their effectiveness.
Fit and Compatibility:
Ensure your goggles fit well with your helmet. There shouldn’t be a large gap between the top of your goggles and the bottom of your helmet (this is called “goggle gap” and can let cold air in and warm air out).
Impact Protection: Optional but Recommended
While not strictly mandatory for beginners, impact protection can significantly reduce the severity of falls, especially as you start to push your limits.
Impact Shorts:
These padded shorts offer protection to your tailbone and hips, areas that often take a beating when you fall.
Knee Pads:
Similar to impact shorts, knee pads offer extra cushioning and protection for your knees.
Wrist Guards:
Many beginners instinctively put their hands out to break a fall. Wrist guards can help prevent sprains and fractures.
If you’re just starting out in snowboarding, having the right gear is essential for a successful experience on the slopes. A comprehensive checklist can help ensure you have everything you need, from boots and bindings to appropriate clothing. For those interested in exploring related topics, you might find this article on top Santa Claus hats for kids quite entertaining, as it highlights the importance of having fun accessories, even when engaging in winter sports.
The Little Things That Make a Big Difference: Accessories and Extras
Beyond the core gear, there are a few other items that will make your snowboarding experience smoother and more enjoyable.
The Snowboard Bag: Transporting Your Gear
If you own your gear, a snowboard bag is essential for protecting it during transport and storage.
Padded vs. Unpadded:
Padded bags offer more protection for your board and bindings, especially if you’re flying with your gear.
Wheels:
For travel, a bag with wheels can be a lifesaver.
Snowboard Lock: Security on the Mountain
If you plan to stop for lunch or a drink, a snowboard lock will secure your board and bindings to a rack, offering peace of mind.
Goggle Wipe and Case: Keeping Your Vision Clear
A soft cloth for cleaning your goggle lenses and a protective case are important for maintaining clear vision and preventing scratches.
Tuning Kit: For the Dedicated Rider
While you likely won’t need this as a beginner renting gear, if you buy your own board, a basic tuning kit will allow you to maintain your edges and wax your board for optimal performance. This includes wax, a scraper, and a basic edge tuner.
Backpack: Carrying Your Essentials
A small backpack can be useful for carrying extra layers, snacks, water, a first-aid kit, and your electronics. Ensure it’s comfortable and doesn’t impede your movement.
Sunscreen and Lip Balm: Protect Against the Elements
The sun’s rays are amplified by reflecting off the snow, even on cloudy days. Always wear sunscreen (SPF 30 or higher) on any exposed skin and lip balm with SPF to prevent sunburn and chapped lips.
Water and Snacks: Fueling Your Day
Snowboarding is physically demanding. Staying hydrated and fueled is crucial. Pack water and some energy-boosting snacks like granola bars or fruit for sustained energy on the mountain.
Embarking on your snowboarding journey is an incredibly rewarding experience. By equipping yourself with the right gear, you’re setting yourself up for a fun, safe, and comfortable adventure. Remember, don’t feel pressured to buy the most expensive gear right away. Many shops offer rental packages for beginners, which can be a great way to try out snowboarding before committing to purchasing your own equipment. As you progress, you can gradually upgrade your gear to suit your evolving riding style. So, get your checklist in order, head to the mountains, and get ready to carve some memories!