
You’ve got the itch. That unmistakable pull to the water, the glint of sunlight on a placid lake, the gentle rhythm of paddling. Your sedan, a reliable chariot for your daily commute, is about to embark on a new adventure: transporting your beloved kayak. But the thought of wrestling with complicated roof rack systems can feel more daunting than navigating a whitewater rapid. Fear not, aspiring paddler! This guide is designed specifically for you, the sedan owner, to unlock the joy of kayak adventures with unparalleled ease. Forget the frustration; we’re talking about a truly effortless installation process that will have you on the water in no time.
Understanding the Basics: Why a Sedan-Specific Rack Matters
Before we dive into the nitty-gritty of installation, it’s crucial to understand why a dedicated sedan kayak roof rack is your best friend. Sedans, with their sleeker profiles and often narrower rooflines compared to SUVs or trucks, require racks that are designed to fit securely and safely. Generic racks might not offer the same level of stability or the correct fit, potentially leading to damage to your car or, worse, a compromised kayak transport. This isn’t just about convenience; it’s about the integrity of your vehicle and your kayaking gear.
The Anatomy of a Sedan Roof Rack
A typical sedan kayak roof rack system consists of a few key components, all working in harmony to provide a secure platform for your kayak. Understanding these parts will demystify the installation process.
Crossbars: The Foundation of Your Rack
These are the horizontal bars that span across the width of your car’s roof. They are the primary load-bearing components and must be robust enough to handle the weight of your kayak, plus the dynamic forces of wind and movement. For sedans, crossbars are often designed to have a lower profile to maintain a more aerodynamic aesthetic.
Foot Packs (or Towers): The Connection to Your Car
These are the crucial pieces that attach the crossbars to your sedan’s specific roofline. Foot packs are engineered with precision to grip your car’s door frames or designated mounting points. The “easy installation” aspect often hinges on how well these foot packs are designed for tool-free or minimal-tool adjustment and attachment.
Kayak Carrier: The Cradle for Your Craft
This is the specialized part that directly holds your kayak. There are several types, each with its own installation method and benefits, but all are designed to cradle your kayak securely and prevent it from shifting during transit.
If you’re looking to install a kayak roof rack on your sedan, it’s essential to understand the various options available and the installation process. For a comprehensive guide on selecting the right roof rack and tips for installation, you can refer to this related article: Top 10 Best Santa Claus Masks 2016 – Latest Bestsellers. This resource provides valuable insights that can help you make an informed decision for your kayaking adventures.
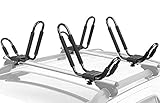
- Durability & Strong Support: PIRIPARA Kayak roof rack are made of sturdy and high quality alloy steel. Come with 2 Pairs(4pcs) kayak rack, can hold 2 kayaks. Total load capcity up to 150 lbs.
- J-Bar Kayak Rack: Kayak carrier rack design in wide mouth J bar offers easier loading and unloading. Optimally sized J style carrier creates more useful roof spaces.
- Protection Design: Heavy Duty Steel Framing with adjustable padding for carrying strength and kayak protection during transport, ensure no damage is done when transporting your kayak or canoe. All surface rust-resistant coating and hardware for longer product life.
- Easy to Install: Quick on/off hardware ensures fast installation and removal. Fit for most factory or aftermarket square,oval and flat crossbars (Not fit for round). PACKAGE INCLUDE: 4 x Kayak Rack, 4 x 8ft Heavy-Duty Tie-Down Straps, Universal Mounting Hardware.
- Multiple Appliaction: 2 Pairs kayak j rack use for transport water sports equipment easily, such as kayaks, canoes, ski & snow boards, surfboards, windsurfing boards and various small sailing boats.

- Kayak Roof Racks: This kayak carrier designed to mount on virtually all crossbars and load bars on the market except round bar
- Longer Service Life: Kayak rack made by high quality steel and the smooth baking finish surface let it with stronger anti-corrosion ability and not easy to rust
- Wide Range of Application: The classic and practical design and the carrying capacity of 150lbs allow you load different items, such as Kayak, Canoe, Suif board, Ski board and Snow Board etc
- J-Bar Design: Wide mouth J-bar offers easier loading and unloading. The carrier secures the kayak on its side, consuming minimal space on the load bar
- Easy to Install and Take Off: Bottom flange thread design, can install or remove the entire kayak rack in 3 minutes

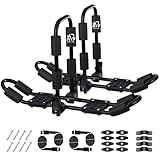
- Upgrade Thicken Design: The FORWODE frame is made of high-strength carbon steel. The thickened tube wall (1.2mm) and diameter (25mm) make the roof frame light and strong. The widened design can support two heavy kayaks up to 160lb. Rust-resistant and corrosion-resistant material features you can keep on the car roof for a long time without removing it.
- Fold Design: Use the handle to adjust the rack from Zero to 180 degrees and fold it to adapt to different shapes of kayaks. The adjustment part is made of carbon steel rather than plastic, which is consistent with the rack material, which is more firm and convenient.
- Perfect Accessories: With 4 pieces ratchet belts, 4 pieces 10ft S-hook ratchet pulleys straps, and 4 pieces anchor belts, you can carry your kayak anywhere with confidence. In addition, we have specially designed the position for the paddle, so you don't have to put any accessories in the car.
- Protection Design: The kayak carrier features exquisite craftsmanship with thicken rubber pedals protectors that provide maximum protection for your kayaks, canoes, and stand-up paddle boards. It also prevents scratches on your roof bar. The 1cm thickened foam also keeps your beloved kayak from getting hurt.
- After-sales: If you have any questions about FORWODE products, please do not hesitate to contact us and we will provide you with a satisfactory solution. Attention: Do not exceed the maximum load specified for the roof rack, accessory rack or the maximum load recommended by the vehicle manufacturer!

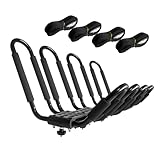
- Stable J-shaped design: The J-shaped kayak bracket is designed at an Angle of approximately 45°, which allows the kayak to safely stick to the J-shaped rack. Several wheels of tape are wound around the kayak to keep it firmly in place.
- Multi-purpose roof racks: Our racks can be used to transport your kayak, canoe or even surfboard sails, as long as they can be tucked into the J-frame. Fits most beams. In particular, the kayak is not suitable for round beams, the specific dimensions can be seen on the details page.
- High quality protection: Bottom gasket upgrade to strengthen the bottom gasket to make the load bearing better, which is not available in other products! The high quality alloy steel frame is strong and it can accommodate kayaks that are 36 inches wide and weigh 75 pounds. It has an anti-rust coating to make it last longer. Protective foam protects the roof frame of your kayak from damage during the bumps of the ride.
- Not applicable models: In order to avoid damage to your car, please specify the distance from the top of the beam to the top of the car, the longest bolt of the roof frame of the kayak is 2.5 inches. The current models are not applicable: 2014 Subaru, 2020 Tacoma. Also not applicable are bars with widths greater than 3.5in, bars with heights greater than 2in, and prototype bars.
- Quality service: You can get 1 sets of high quality kayak roof racks(2Ropes) . The customer is our first principle. If you have any questions after receiving the goods, please contact us the first time without hesitation, we will give you a satisfactory solution.

- 【2-Pair Value Pack: Double the Adventure】Get the complete set of 4 kayak roof racks to securely transport two kayaks at once. Built from heavy-duty alloy steel with a rust-resistant finish, support a total capacity of 150 lbs. Perfect for couples, families, or weekend trips with friends, adventure seekers.
- 【Wide-Mouth J-Bar: Load in Seconds】The optimized J-bar design creates a wide-mouth opening, making loading and unloading your kayak effortless. By securing the boat on its side, it saves half your roof space for additional gear or a second kayak rack.
- 【Total Hull Protection & Stability】Our heavy-duty frame features extra-thick, oversized foam padding and adjustable spacers to cushion your kayak’s hull against road vibrations. Includes 4 upgraded tie-down straps for high-speed highway stability.
- 【Universal Fit & Simplified Setup】Engineered with an intuitive bottom-flange thread design for a 10-minute "no-headache" installation. Securely fits most factory or aftermarket Square, Oval, and Flat crossbars. (Note: Only for vehicles with crossbars; not for round bars).
- 【Multi-Sport Versatility】Not just for kayaks—this heavy-duty carrier is your year-round outdoor partner for canoes, paddleboards (SUP), or surfboards up to 36" wide. Rust-resistant coating ensures durability across salt-water beaches and mountain lake environments.
- DOUBLE KAYAK RACK: 4PCS set Kayak Rack to help you save cargo space and keep your kayak safe during long drive on the way to the destination.
- HEAVY DUTY: Doesn't fit ROUND BAR. Steel construction with power coated, makes the rack stronger and not easy to get rust. Maximum Lock tight on your kayak, Canoe, 8 Ft long, 150 Lbs Tested, easy and safe for your transport.
- REDUCE SCRATCH: Extra foam padded design to reduce any scratch and prevent the cannoe or kayak from rubbing
- MULTI PURPOSE USE: Easy to Install, use this car roof rack to carry Kayak, Canoe, Suif board, Ski board, Snow Board and SUP
- Extra 4 pcs tie down straps including.
- Easy to Assemble: The product comes with detailed instructions to help you quickly complete the installation of the kayak luggage rack with 24-hour customer service support available
- Load Bearing Capacity: This J bracket can accommodate a 42-inch wide, 72 kg/158 lb kayak
- Durable Materials: The luggage rack of the kayak uses space aluminum brackets and foam rubber outer protective pads. The aluminum alloy tube with a thickness of 2.2mm is lightweight, durable and rust-resistant
- Roof Protection Design: The kayak luggage rack is designed with your roof's safety in mind. The included screws, with a standard length of 75mm, are carefully selected to prevent scratching even during transportation vibrations. Additionally, bonus 65mm screws are provided, allowing customers to choose the appropriate size for installation, ensuring a secure fit without risking damage to their vehicle's roof
- Lifting and Folding Design: Come with quick fold down design, By adjusting the angle, different styles of kayaks can be placed, it can be used not only for kayaking, but also for skis, surfboards, small canoes, luggage, and more

- Ultimate Versatility for All Your Gear : This universal car roof rack is the perfect solution for transporting kayaks, surfboards, SUPs, canoes, snowboards, and more; Designed to fit SUVs, sedans, hatchbacks, and 2-door or 4-door cars;with or without side rails;it’s your go-to for beach trips, mountain adventures, or lake outings; Convenience and reliability guaranteed
- Heavy-Duty Cargo Mat for Maximum Protection: Built with durable 1680D fabric and reinforced PVC coating; this EVA foam cargo mat provides a soft, protective surface for your gear; Its non-slip bottom design minimizes movement; reduces noise; and enhances stability; making it ideal for heavy loads and long journeys; Keep your cargo secure and your vehicle scratch-free
- Complete Cargo Securing Kit Included: This kit has everything you need for safe and secure load fastening; 2x 13 ft tie-down straps with cam buckles; 4x 16 ft tie-down straps; and 2x T-shape loop straps; Made from high-quality; tightly stitched materials; these straps ensure maximum durability and reliability for all types of cargo
- Scratch-Proof Design for Vehicle and Cargo Safety: Our cam buckle features a Neoprene Sleeve to protect your vehicle and cargo from scratches and damage; Pro Tip: Always throw the strap end without the buckle when adjusting to avoid accidental scratches; Safety and care are built into every detail
- Quick and Easy Installation : Setting up this roof rack is a breeze; Just follow these simple steps: 1) Clean your car roof; 2) Secure the roof rack with the included 13 ft tie-down strap; and 3) Fasten your cargo using the 16 ft tie-down straps; Perfect for adventurers who value efficiency and ease
- Stable J-shaped design: The J-shaped kayak bracket is designed at an Angle of approximately 45°, which allows the kayak to safely stick to the J-shaped rack. Several wheels of tape are wound around the kayak to keep it firmly in place.
- Multi-purpose roof racks: Our racks can be used to transport your kayak, canoe or even surfboard sails, as long as they can be tucked into the J-frame. Fits most beams. In particular, the kayak is not suitable for round beams, the specific dimensions can be seen on the details page.
- High quality protection: Bottom gasket upgrade to strengthen the bottom gasket to make the load bearing better, which is not available in other products! The high quality alloy steel frame is strong and it can accommodate kayaks that are 36 inches wide and weigh 75 pounds. It has an anti-rust coating to make it last longer. Protective foam protects the roof frame of your kayak from damage during the bumps of the ride.
- Not applicable models: In order to avoid damage to your car, please specify the distance from the top of the beam to the top of the car, the longest bolt of the roof frame of the kayak is 2.5 inches. The current models are not applicable: 2014 Subaru, 2020 Tacoma. Also not applicable are bars with widths greater than 3.5in, bars with heights greater than 2in, and prototype bars.
- Quality service: You can get 2 sets of high quality kayak roof racks(4Ropes) . The customer is our first principle. If you have any questions after receiving the goods, please contact us the first time without hesitation, we will give you a satisfactory solution.

- Foldable Bracket Design: The J-shaped rod can be folded from multiple angles, and can accommodate 2 medium-sized kayaks when fully loaded. When empty, the kayak roof rack can be folded, allowing your car to easily enter parking lots and garages without disassembly
- Complete Strap System: Includes 4 S-hook rated ratchet belts and 4 ratchet belts to maximize the locking of your canoe, boat, SUP, snowboard, and surfboard, making it convenient and safe to fully enjoy your vacation
- Extra Large Knobs for Easy Adjustment: Features 2 upgraded extra large knobs on each bracket, making it easier to adjust to the appropriate angle to fit kayaks of different sizes and shapes
- Rubber Pedal and Foam Protector: Foam liner and rubber bottom cover are made of real rubber and foam. They are non slip, waterproof, and sun proof to protect your kayak and vehicle
- T-Shaped Anchor Point System: Provides connection points below the hood, luggage compartment, and hatch to secure the bow and stern of the ship with an S-shaped hook rated ratchet belt
Pre-Installation Checks: Setting Yourself Up for Success
Just like a good paddle stroke requires proper form, a smooth installation starts with preparation. Taking a few moments before you even open the box can save you a world of headaches.
Read the Manual: Your Roadmap to Easy Installation
This might sound obvious, but it’s the most critical step. Every rack system is different, and while this guide aims for general ease, the manufacturer’s instructions are your definitive source. Pay close attention to any diagrams or specific warnings related to your sedan model.
Decoding the Symbols
Manufacturers often use specific icons or abbreviations. Familiarize yourself with them to avoid confusion during installation.
Identifying All Components
Lay out all the parts and compare them against the parts list in the manual. Ensure nothing is missing or damaged. Missing a single bolt can halt your progress entirely.
Cleaning Your Sedan’s Roof: A Clean Slate
Dirt, dust, and debris on your car’s roof can act as abrasives, potentially scratching your paintwork during rack installation. A clean surface also ensures the best possible grip for the foot packs.
The Power of Microfiber
Use a clean microfiber cloth and a gentle car wash soap or detailing spray. Avoid abrasive materials that could leave swirls.
Reaching All Angles
Don’t forget the areas where the foot packs will make contact. A quick wipe-down of the entire roof area, especially around the door frames, is a good practice.
The Core Installation: Step-by-Step for a Sedan
Now, let’s get hands-on. The beauty of a sedan-specific, easy-installation rack lies in its intuitive design, making the process achievable for most car owners.
Attaching the Foot Packs: The Secure Grip
This is arguably the most critical part of the installation. The foot packs create the direct interface between your car and the rack system.
Identifying the Correct Mounting Points
Your sedan might have specific areas designed for roof rack installation, such as reinforced door frames or pre-drilled mounting points under trim pieces. Your manual will clearly indicate these.
Tool-Free vs. Minimal Tool Attachment
Many modern sedan racks boast tool-free adjustment mechanisms. This often involves levers or dials that allow you to tighten the foot packs around the door frame. If tools are required, they are typically a simple hex key or wrench, usually included with the kit.
The “Click” of Security
Listen for audible clicks or tactile feedback when tightening the foot packs. This often indicates that the locking mechanism is engaged and the clamp is securely attached. Don’t overtighten, as this can damage your car’s paint or the rack itself.
Mounting the Crossbars: The Backbone of the System
Once the foot packs are in place, attaching the crossbars is usually a straightforward process.
Aligning for Stability
Ensure the crossbars are positioned evenly and symmetrically on your roof. Most racks have measurement indicators to help you achieve this. Proper alignment is crucial for weight distribution and stability.
Securing the Crossbars to the Foot Packs
This often involves sliding the crossbars into designated slots on the foot packs and then securing them with integrated clamps or bolts. Again, listen for those reassuring clicks or feel the tightness of the fasteners.
Checking for Wobble
After tightening, give each crossbar a gentle shake. There should be no significant wobble or play. If there is, re-check the attachment of the foot packs and the crossbars.
Attaching Your Kayak Carrier: Tailoring the Rack to Your Kayak
With the crossbars firmly in place, it’s time to add the specialized carriers that will cradle your kayak. The type of carrier will dictate the exact steps, but the principles of secure and stable attachment remain constant.
Different Carrier Types, Similar Ease
Most modern kayak carriers are designed for quick and easy attachment to standard crossbars.
J-Cradles: Angled for Efficiency
These carriers are shaped like a “J” and hold the kayak on its side. They are often favorites for their space-saving qualities and ease of loading. Installation typically involves bolting them onto the crossbars.
Stackers: Maximizing Your Roof Space
If you plan to transport multiple kayaks, stackers allow you to load them vertically, one on top of the other. These also mount to the crossbars.
Saddle-Style Carriers: Gentle Support
These carriers provide a broad, padded surface for the kayak’s hull. They are particularly good for wider kayaks and offer excellent protection. Their attachment to the crossbars is usually quite simple, often using straps or clamps.
Securing the Carrier with Confidence
Regardless of the carrier type, the goal is to create a solid, unmoving platform for your kayak.
Following Manufacturer Guidance
Each carrier will have its own specific instructions for mounting. Adhere to these precisely.
Using Washers and Bolts Correctly
Ensure you use the correct washers and that all bolts are tightened securely, but not excessively.
Pre-Assembly Check
Many carriers can be assembled on the ground before being attached to the crossbars, further simplifying the process.
If you’re considering installing a kayak roof rack on your sedan, you might find it helpful to read a related article that provides detailed instructions and tips for a successful installation. This guide covers everything from selecting the right rack to ensuring a secure fit for your vehicle. For more information, you can check out this informative resource on kayak roof rack installation. It offers valuable insights that can make the process smoother and more efficient.Loading and Securing Your Kayak: The Final Frontier of Easy Installation
The rack is installed, the carriers are in place, but the job isn’t done until your kayak is safely loaded and secured. This is where “easy installation” truly extends to the entire process.
The Art of the Lift: Making it Manageable
Loading a kayak onto a sedan roof rack can be the most physically demanding part, but with the right technique and rack design, it becomes much more manageable.
Using Loading Assistants
Many modern racks incorporate features like loading rollers or tilting mechanisms that make it easier to slide or lift your kayak into place. These are game-changers for preventing strain.
The Strategy of the Slide
If you have a lighter kayak, you might be able to slide it onto the carriers from the rear of the vehicle. Position the kayak’s stern on the edge of the bumper, then lift and slide it forward.
Enlisting a Friend
For heavier kayaks or if you’re new to car-topping, having a helping hand makes a significant difference and is always a safer option.
The Critical Straps: Beyond Just Tightening
Straps are your final line of defense against a shifting kayak. Investing in good quality straps with reliable buckles is paramount.
Bow and Stern Tie-Downs: Essential Safety
Never skip the bow and stern tie-downs. They prevent the kayak from lifting or shifting forward or backward, especially during braking or acceleration.
Proper Strap Placement
Position the straps so they lie flat on the kayak and are in contact with the carriers, not just the hull. This distributes the load evenly.
The “Shake Test”
Once everything is strapped down, give the kayak a firm shake. It should not move at all. If it does, tighten the straps further or re-evaluate your tie-down points.
Post-Installation Peace of Mind: Ongoing Features and Maintenance
An “easy installation” doesn’t just end with the last click. It’s about a system that instills confidence and requires minimal future fuss.
Integrated Locking Mechanisms: Security and Convenience
Many high-quality sedan kayak roof racks come with integrated locks for the foot packs. This deters theft and provides an extra layer of security for your investment.
The Key to Peace of Mind
These locks are often keyed alike, meaning one key operates all the locks on your rack system, further simplifying their use.
Regular Inspection
While designed for durability, a quick visual inspection of the locks periodically ensures they are functioning smoothly.
Aerodynamic Design: Reducing Noise and Drag
Easy-to-install racks for sedans are often designed with aerodynamics in mind. This translates to less wind noise inside your cabin and improved fuel efficiency on your journey.
Sleek Profiles
Sleek, low-profile designs not only look good but also minimize wind resistance.
Integrated Wind Diffusers
Some systems include small spoilers or diffusers on the crossbars to break up wind flow and reduce noise.
Durability and Material: Built to Last
The materials used in your rack system are crucial for its longevity and your peace of mind.
High-Strength Alloys and Composites
Look for racks made from robust materials like powder-coated steel, anodized aluminum, or high-impact polymers.
Weather Resistance
Ensure the components are resistant to rust, corrosion, and UV damage, as they will be exposed to the elements.
Simple Maintenance for Long-Term Performance
Even the easiest-to-install racks benefit from occasional simple maintenance to ensure continued smooth operation and longevity.
Cleaning the Components
Periodically clean the entire rack system with mild soap and water to remove dirt, salt, or road grime that can degrade materials over time.
Lubricating Moving Parts
If your rack has any moving or articulating parts, a light application of a silicone-based lubricant can ensure they continue to operate smoothly.
Checking for Wear and Tear
Before each trip, give the rack a quick visual inspection for any signs of damage, loose parts, or excessive wear. Addressing minor issues early can prevent larger problems down the road.
Tightening Fasteners
Over time, vibrations from driving can cause fasteners to loosen slightly. A periodic check and tightening of all bolts and screws with the appropriate tool is a good preventative measure.
By following these steps and understanding the design principles behind your sedan kayak roof rack, you’ll discover that transforming your car into a kayak-carrying adventure machine is not only achievable but remarkably straightforward. So, ditch the doubts, embrace the ease, and get ready to hit the water. Your next great paddle awaits!